Buying in China and Asia? It is imperative to engage a qualified third-party inspection service company, a professional quality assurance pre-shipment inspection gives importers assurance that their goods meet the required standard before they’re dispatched. Ultimately, this safeguards both the importer's brand integrity and the supplier's ongoing reliability.
PSI inspection is an important part of the quality control services that GIS provides. It allows you to catch any issues before shipping so that you can deal with them long before any substandard products reach your customers. This quality control procedure helps businesses to protect against the cost, disruption and damage to brand image caused by sub-standard goods.
Content
What are the steps and procedures of pre-shipment inspection?
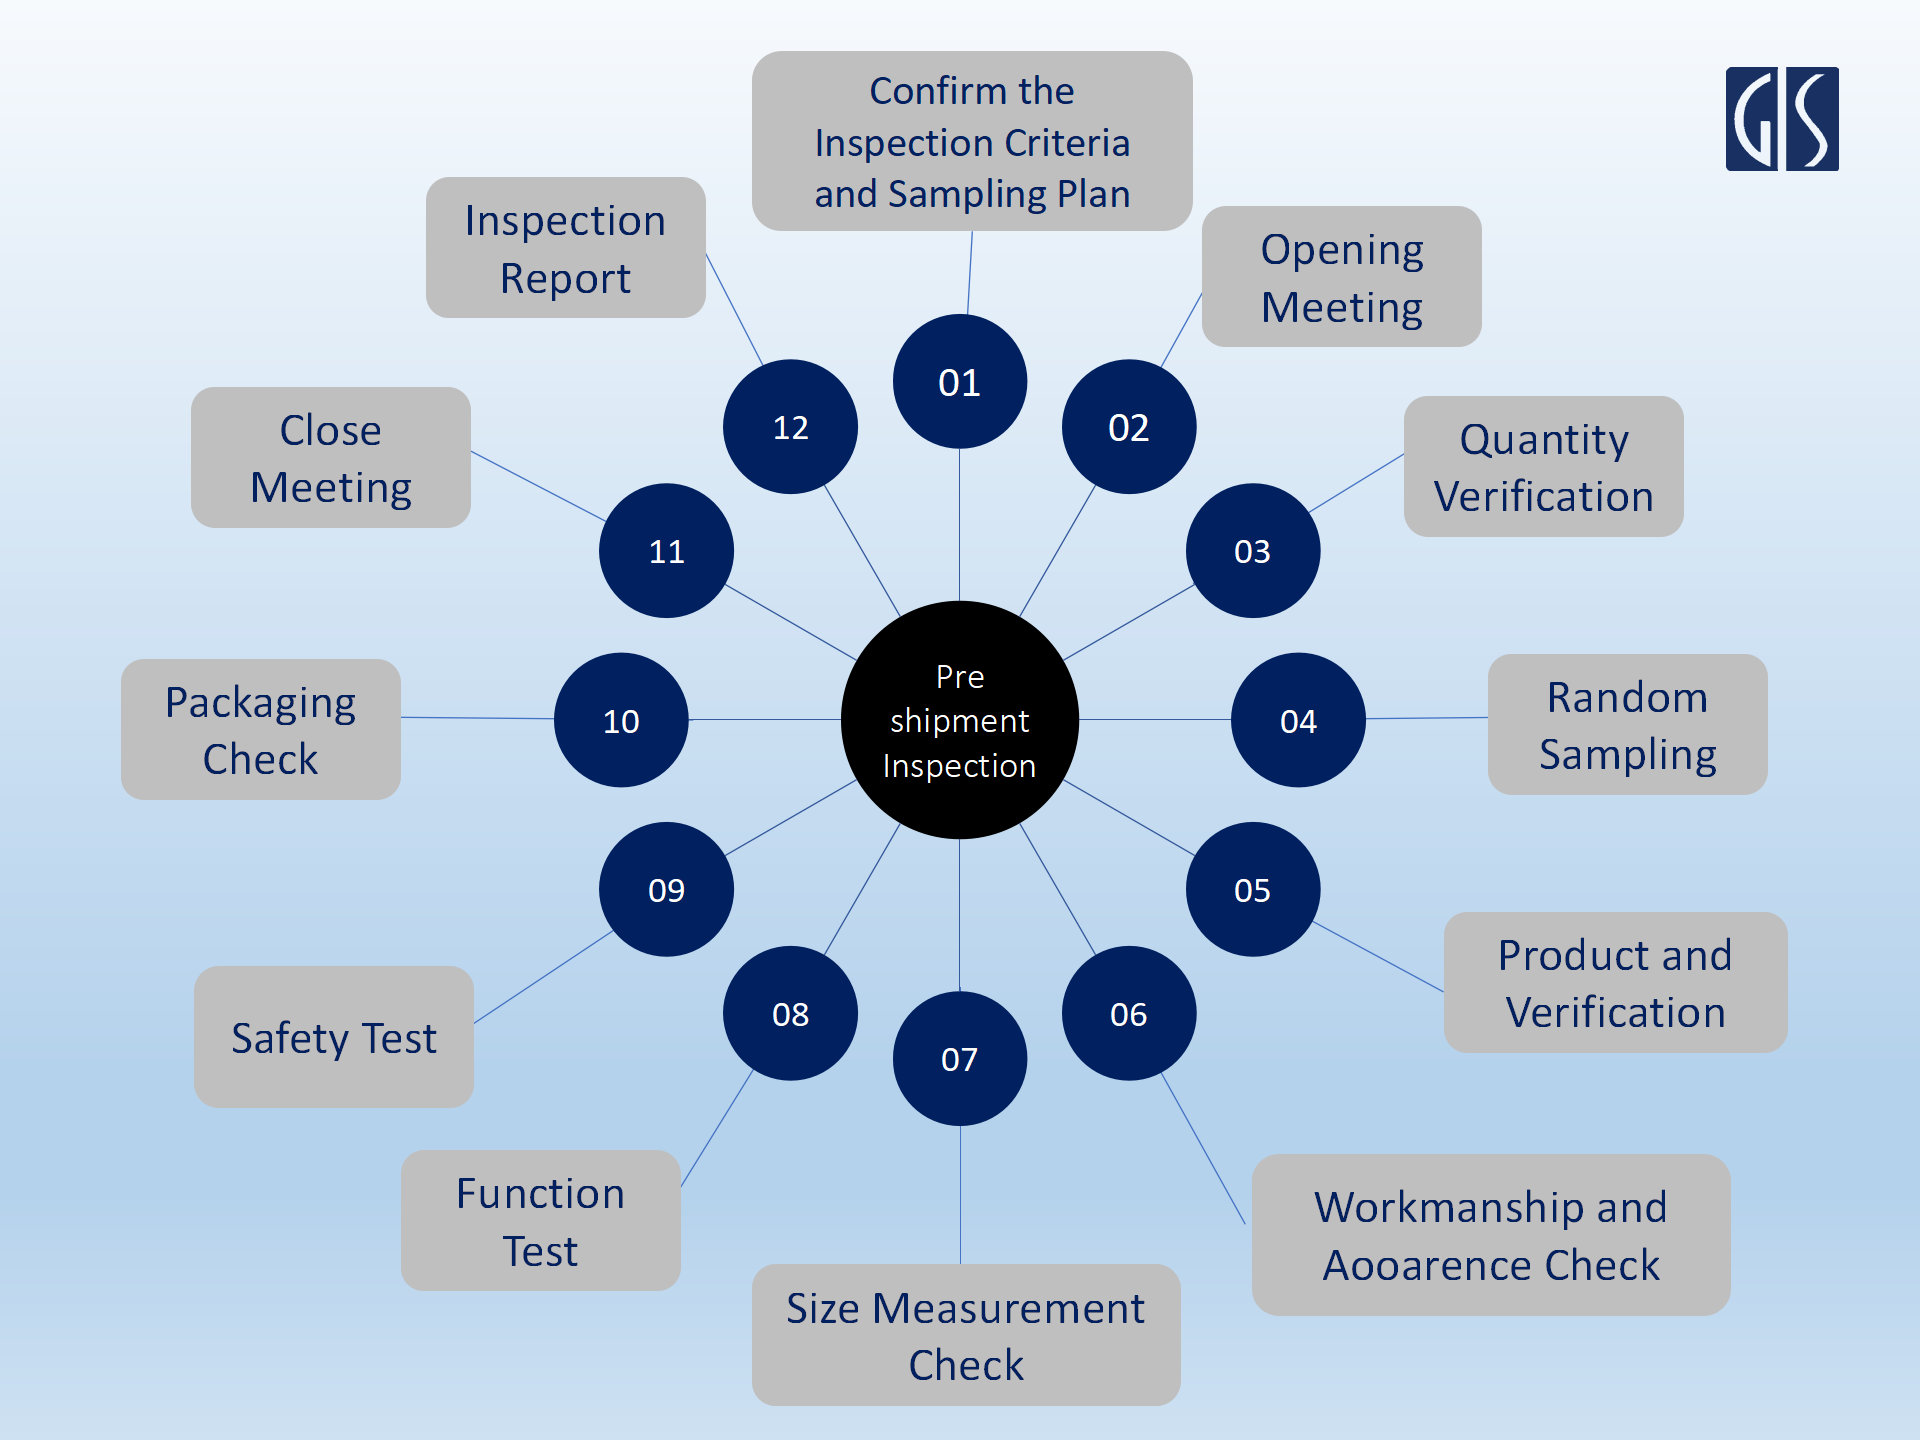
The pre shipment inspection covers the quantity check, random sampling, workmanship check, onsite test of goods that have been ordered. The following 12steps will help you understand how a third-party pre shipment inspection works:
1. Inspection Criteria and Sampling Plan Confirmation
Confirm inspection date, sampling method, product checklists, and inspector. Before the inspection begins, discuss and confirm all inspection requirements and the sampling plan, and product checklists with the client. During this stage, details such as product types, quantity, packaging, labeling, and testing methods are reviewed carefully.
This foundational step transcends mere checklist confirmation; it is a critical exercise in proactive risk mitigation and defining acceptable commercial quality standards.
Strategic AQL Determination and Risk Profiling
The selection of the Acceptance Quality Limit (AQL) must be a strategic decision, not a reliance on industry default settings (e.g., Major 2.5 / Minor 4.0). Inspectors must collaborate with the client to deploy a Product Risk Matrix to profile the specific order.
-
For High-Risk Goods: Products that carry inherent safety liabilities (e.g., medical devices, children's toys) or those critical to premium brand positioning require substantially stricter AQL levels, such as Major 1.0 or Major 1.5. A failure here directly correlates with potential brand equity erosion, regulatory fines, and costly product recalls.
-
Corroboration: By customizing the AQL, the importer ensures the inspection scope aligns precisely with their tolerance for defects, effectively bridging the gap between manufacturing standards and consumer expectation.
Regulatory Compliance and Mandatory Labeling Verification
The official inspection checklist must be rigorously cross-referenced against the mandatory regulatory landscape of the destination market. This serves as a vital legal gatekeeper for market access.
-
Corroboration: Crucial elements such as Country of Origin, fiber content, sizing, and specific Warning Statements (e.g., for choking hazards or material toxicity) are non-negotiable legal requirements. The verification of these Labeling Requirements during PSI is essential, as non-compliance will invariably lead to customs holds, shipment rejection, and significant financial penalties.
2. Opening Meeting
The inspectors visit the manufacturer at the appointed time and have an opening meeting with factory to sign compliance documents, recap the inspection details and estimated the timing for inspection. Pre-Shipment Inspections are usually carried out on-site at the factory or production house.
3. Quantity Verification
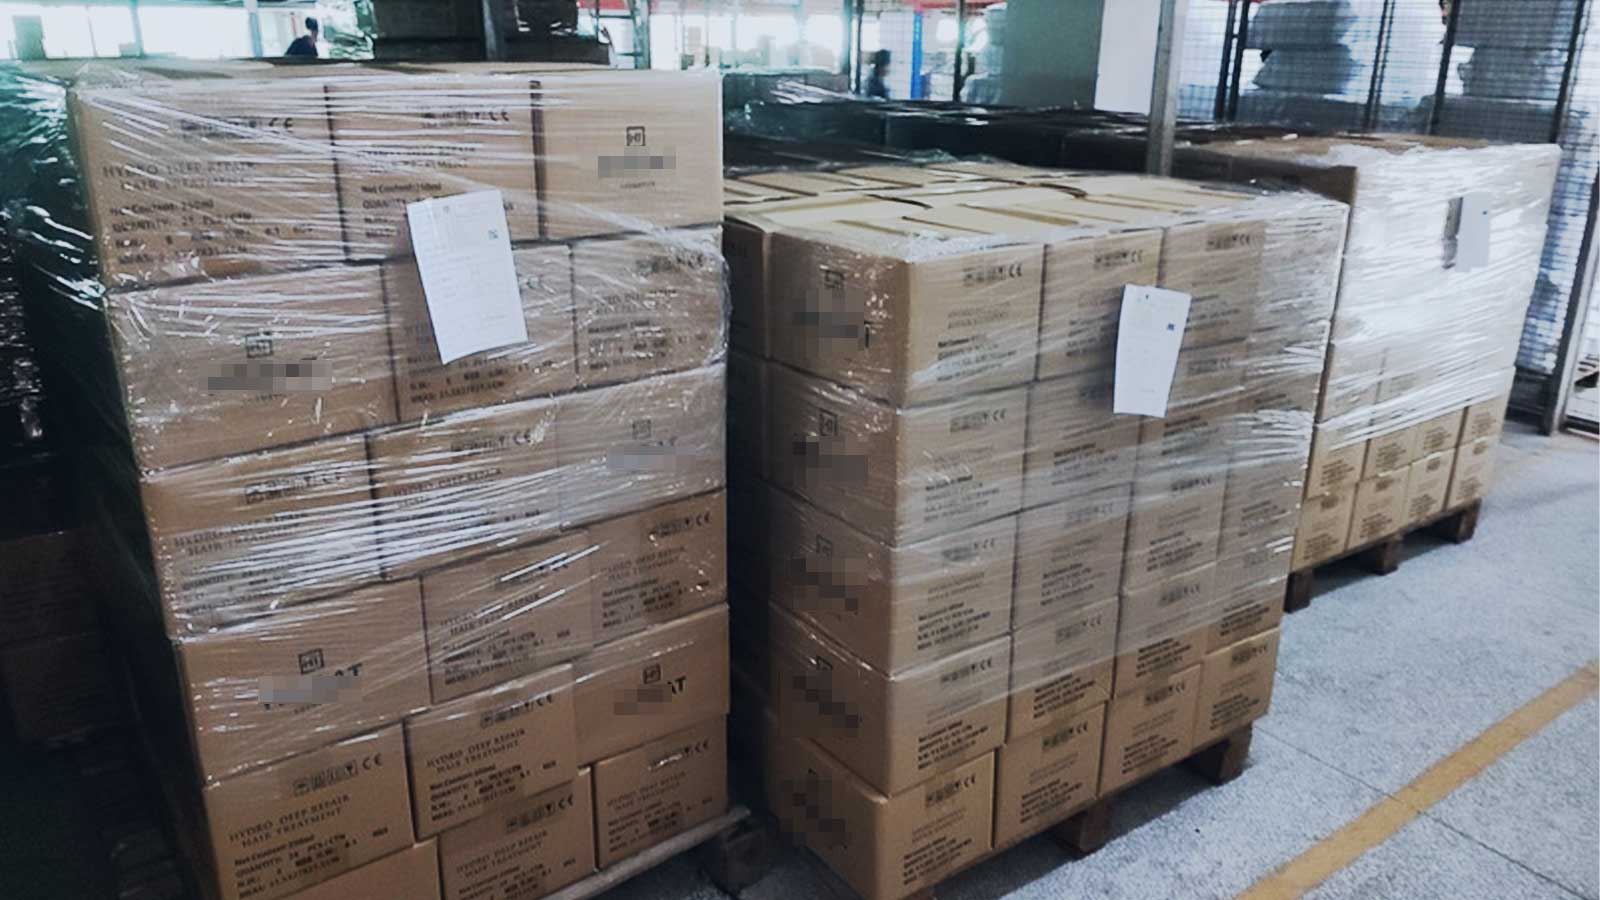 Source: GIS conducting a quantity check during a shampoo inspection for a Russian client.
While seemingly straightforward, the verification of finished goods quantity is a crucial checkpoint that directly impacts logistics planning, financial exposure, and inventory accuracy. This step is about far more than simple counting; it ensures contractual fulfillment and optimizes the subsequent shipping process.
Logistics Integrity and Inventory Reconciliation
The inspection must rigorously confirm that the produced quantity aligns perfectly with the Purchase Order (PO) specifications. Critically, inspectors must distinguish between products that are merely finished and those that are finished and packaged (ready for shipment).
-
Corroboration: Financial Risk. Shipping an order with a shortfall constitutes a material breach of contract and generates immediate financial consequences. Conversely, incomplete packing can lead to inefficient container loading, resulting in dead freight (paying for unused container space) or, worse, the requirement for a costly, high-speed partial shipment later on.
-
Depth Enhancement: Verification must include an assessment of carton integrity and marking. Discrepancies found at this stage must be immediately reported to reconcile inventory records and prevent unexpected shortages at the destination warehouse, which would otherwise disrupt distribution schedules.
4. Random Sampling
Professional Pre Shipment Inspection services use the internationally recognized statistical sampling procedure ANSI/ASQC Z1.4 (ISO 2859-1) to ensure the whole batch is of good quality. The number of things he picks (the Acceptance Quality Limit or AQL) is usually defined in the contract between the manufacturer or importer and the client.
GIS Inspection as well follows the ISO 2859 standard and the AQL sampling provided by it. To evaluate the overall production lot quality, GIS inspectors will verify sampling products on their functional, visual, and material properties.
After monitor the procedure for the selected carton transport to the inspection room, the inspectors get inspection sample size randomly from one carton based on sample plan MIL.STD-105E.
GIS’s default limit is critical. 0, Major. 2.5, Minor. 4.0, which means that the limit of Critical defects is 0, Major defects are 2.5, and Minor defects are 4. These limits indicate the maximum number of product defects in the sample size for acceptance of the order.
You can establish your own acceptance limits based on your acceptable quality. For high-value products sometimes critical. 0, Major. 1.5, Minor. 4.0, is used, or even Major. 1.0, Minor. 2.5.
Learn more about AQL: AQL Acceptable Quality Limit
5. Product and Verification
This stage serves as the primary defense line for brand equity and adherence to intellectual property (IP) standards. The verification process moves beyond basic visual checks to confirm that the factory’s mass-produced output is an exact mirror image of the client’s approved Golden Sample and contractual specifications.
Brand Integrity Verification (Aesthetics and Materials)
Inspectors must rigorously verify that all aesthetic and material properties are consistent with the approved standard. This requires meticulous attention to detail:
-
Color Fidelity: Confirmation that color hues and finishes precisely match the approved Pantone codes or material swatches, as discrepancies here immediately impact brand perception.
-
Material Composition: Verification that the materials used (e.g., fabric type, plastic grade, metal finish) conform to the exact specifications outlined in the technical documentation, preventing unauthorized substitutions that could compromise quality or regulatory compliance.
-
Corroboration: Any deviation in appearance, texture, or finish must be treated as a major defect, as inconsistency erodes customer trust and dilutes the product's premium positioning in the market.
Intellectual Property (IP) and Component Security
A crucial, high-level verification is the assessment of any unauthorized design changes or component substitutions, which pose significant commercial and legal risks.
-
Depth Enhancement: Inspectors must ensure all artwork, logos, and proprietary design features are reproduced accurately and are free from printing errors or positional misalignment. Furthermore, they must confirm that the factory has not utilized unauthorized components (e.g., swapping a specified certified chipset for a cheaper, unapproved alternative).
-
Corroboration: Identifying unapproved components is vital for mitigating hidden supply chain risks and preventing IP infringement—an error that can lead to costly lawsuits, border seizures, and permanent termination of the supplier relationship.
6. Workmanship Check
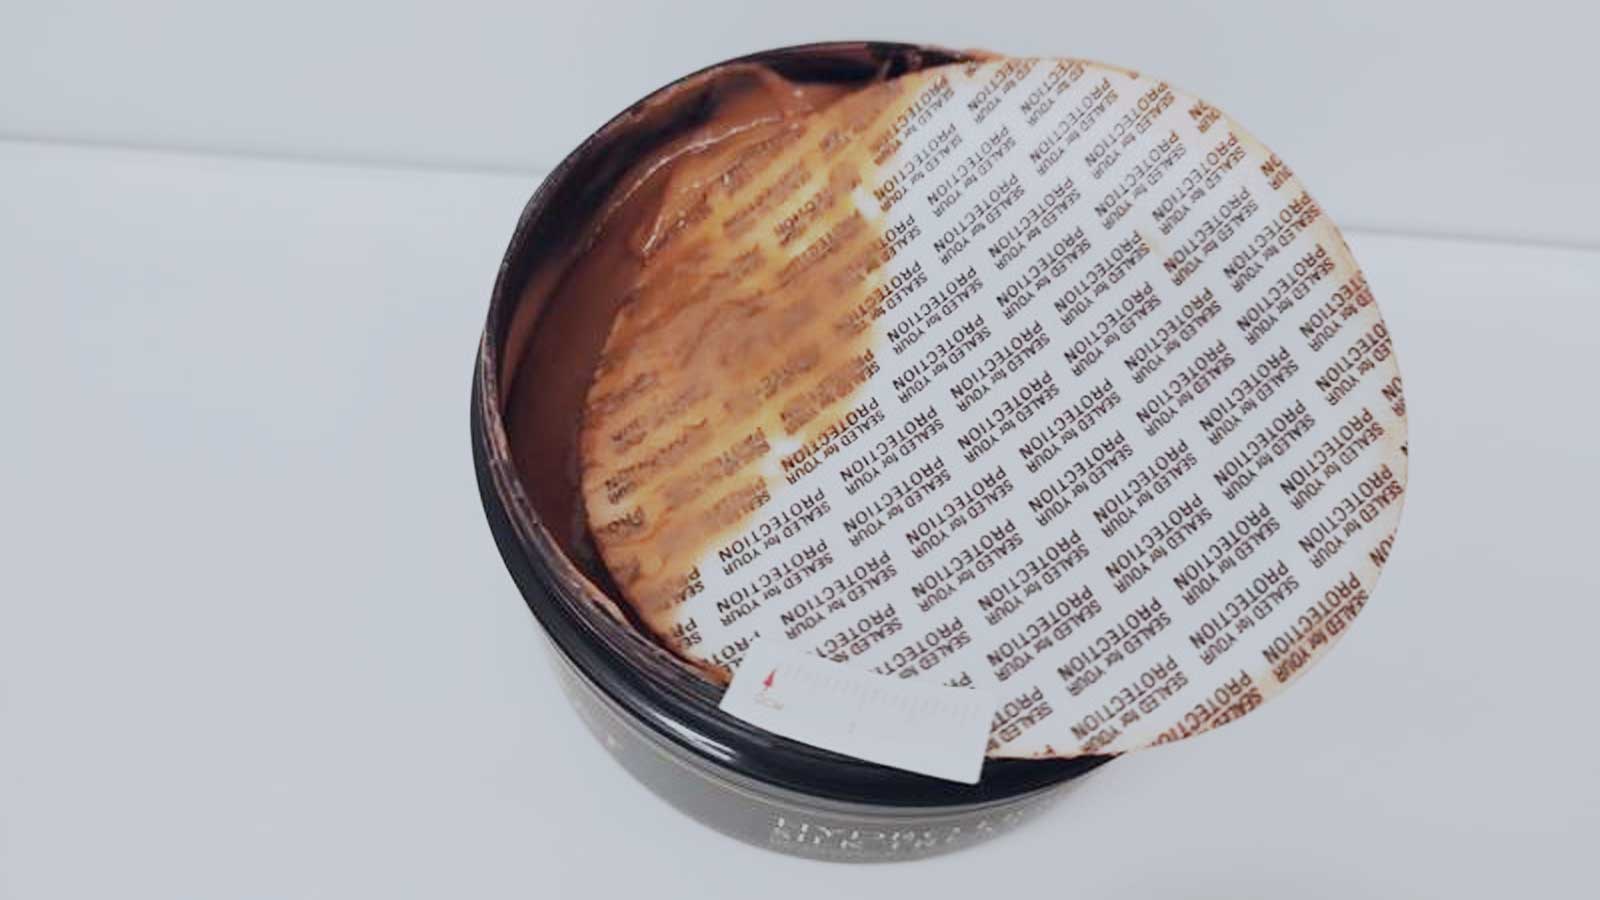
Source: GIS inspectors detected product defects during the shampoo quality check.
4. Workmanship and Appearance Check: Gauging Manufacturing Process Stability
The workmanship check is the most direct assessment of the manufacturer’s technical capability and the stability of their production processes. It is not merely an exercise in defect counting; it provides critical data for the importer to judge the factory's quality control discipline and overall output consistency.
Defect Classification and Quality Discipline
Inspectors use the defined AQL limits to categorize and quantify observed defects. This rigorous classification (Minor, Major, Critical) must be systematically documented.
-
Depth Enhancement: The frequency and nature of the defects discovered serve as a direct Key Performance Indicator (KPI) for the factory’s internal process control. For instance, a high incidence of Major defects (e.g., severe paint blemishes, non-functional zippers, misaligned parts) signals systemic instability in the assembly line or primary tooling.
-
Corroboration: Process Audit Trigger. When defect rates exceed the acceptable AQL threshold, the inspection report should formally recommend triggering a Corrective and Preventive Action (CAPA) plan or an immediate, focused Process Audit. This transforms the inspection finding from a static count into a dynamic mechanism for continuous quality improvement.
Tracing Quality Issues to Root Causes
A professional inspection emphasizes not just what the defects are, but why they occurred.
-
Expertise Focus: Inspectors look for telltale signs of poor manufacturing discipline, such as sharp edges resulting from inadequate trimming, color inconsistency due to poor material mixing, or blemishes caused by improper handling.
-
Corroboration: Root Cause Analysis (RCA). By meticulously documenting the location and type of recurring defects, the inspection report provides the initial evidence required for the manufacturer to conduct a Root Cause Analysis (RCA). This structured approach moves beyond superficial fixes, compelling the factory to address the fundamental flaws in their standard operating procedures (SOPs).
7. Size Measurement Check
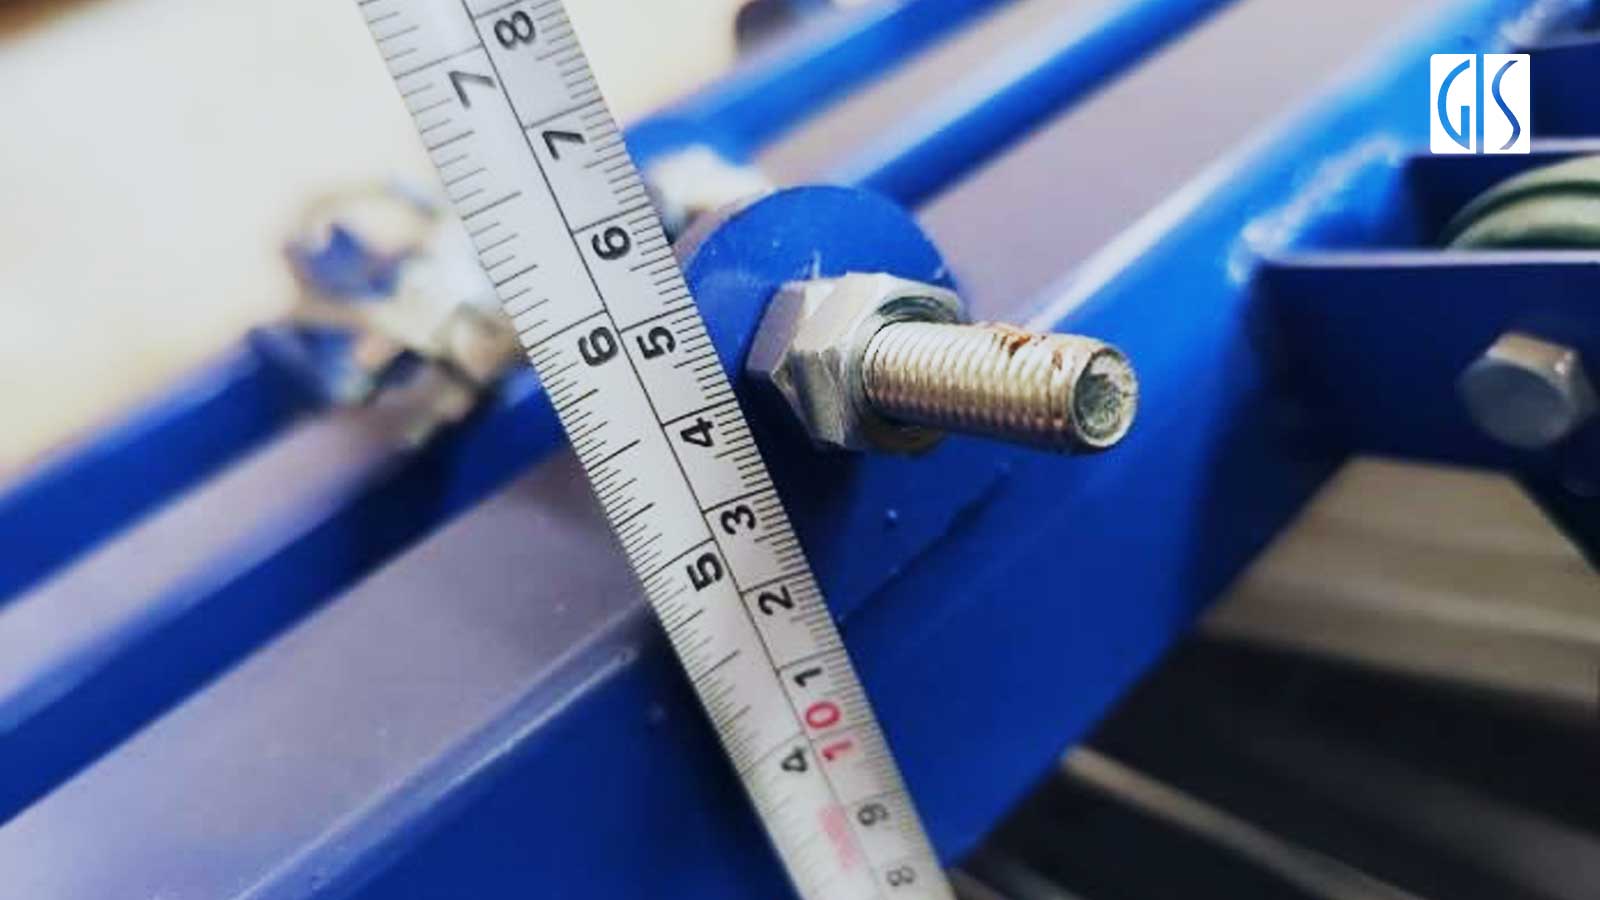
Resources: GIS performed a forklift inspection for the client and documented the measurements with photos.
Check or measuring the important data/parameters which reflect the product quality or performance according to legalized method or stated in client approved product specification or other agreed documents by client.
Size measurement for Garment and Apparel
The consumers want clothes that fit well and are true to size, which is why measuring garment dimensions is absolutely crucial for quality control. The quality control inspector takes measurements of the different parts of the garment being checked and compares them against client specifications. This is done for every clothing size in the order.
To make sure this check is carried out properly, the garment specifications should clearly state the points of measurement (e.g., sleeve length, neck width), the standard measurements for each size, and acceptable tolerances for each point of measurement.
8. Function Test
Function Testing for Textiles
For garments, apparel and footwear, inspectors will usually perform various product specific tests. For example, buttons, zippers, and other accessories can all be checked with pull tests, fatigue tests, and stretch tests. Alternatively, the weight and composition of fabric can be checked against a client's specifications.
Function Testing for Electrics
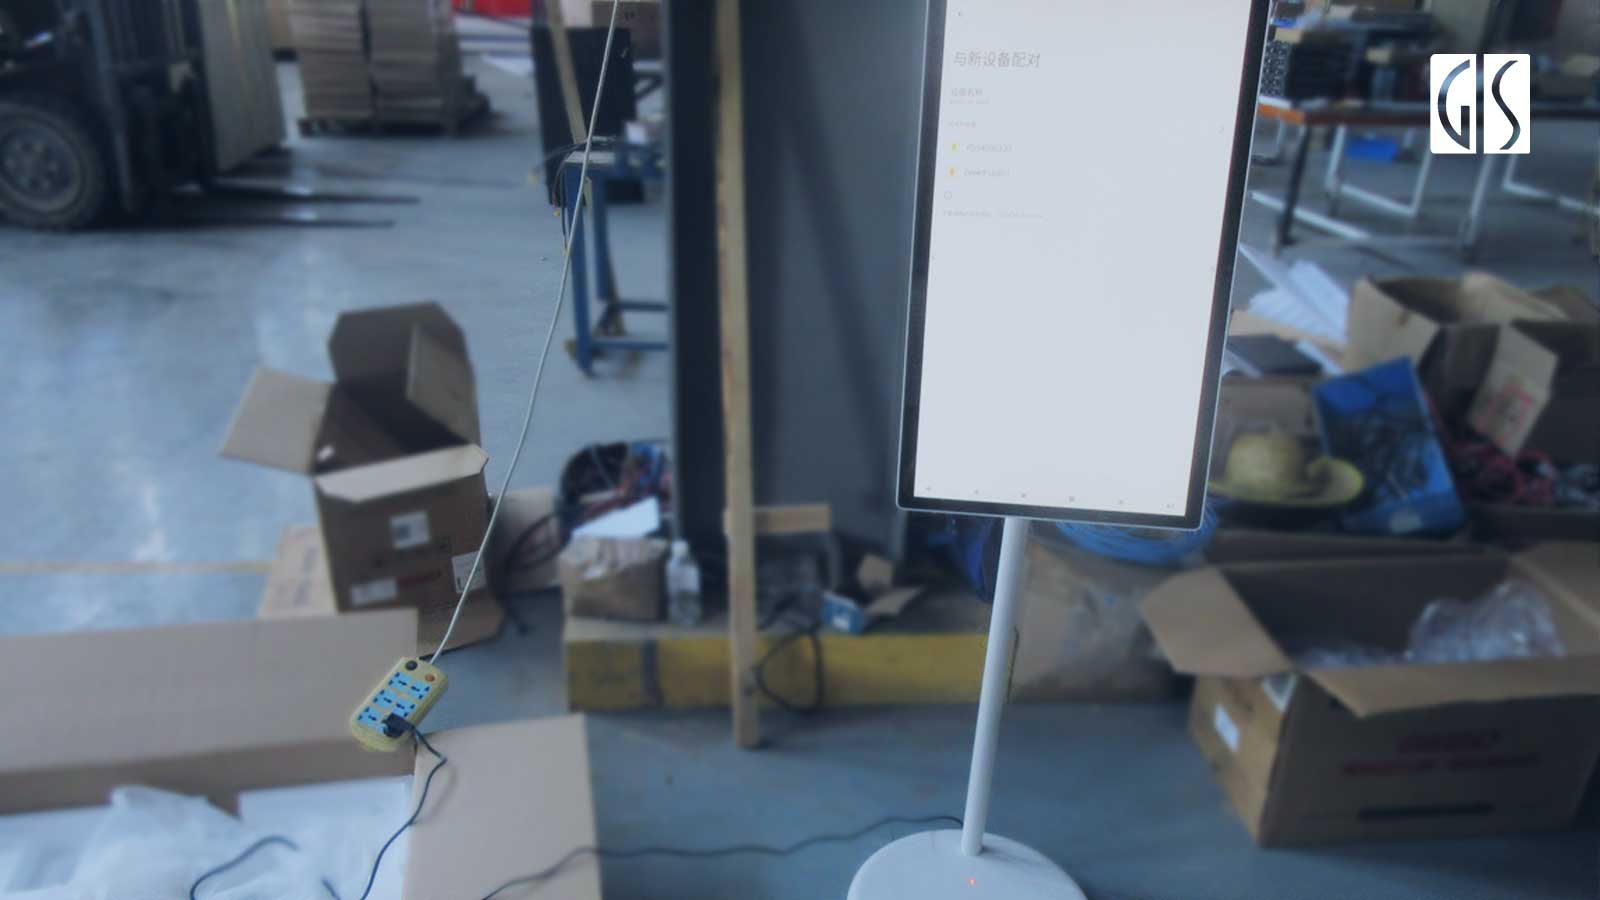
Functional integrity checks are executed strictly in accordance with the Purchase Order, approved specifications, and the product's instructional manual.
For example, psi inspection for coffee machine, inspector perform basic function, full function, input power consumption, and keep worm test.
Instead of simply checking if a feature works, the inspection verifies its durability. For textiles and apparel, this includes fatigue tests on closures, zippers, and fastenings, and stress tests on seams and high-wear areas to predict failure points.
For electronic goods, this means performing full-cycle function checks, confirming performance parameters (e.g., speed, power consumption, thermal management) against technical specifications.
For complex electronics or mechanical items, the inspection should verify key performance indicators (KPIs) under various stress factors. This may include on-site checks for noise levels, vibration tolerance, or, where feasible, limited ambient temperature performance checks.
Learn more about coffee machine pre shipment inspection method: Complete Checklist for Household Coffee Machine Quality Inspection
9. Safety Test
This is arguably the most critical stage of the Pre-Shipment Inspection (PSI), as it addresses legal mandatory requirements and the importer’s non-negotiable obligation for consumer safety. A failure here is not a quality issue; it is a legal and commercial barrier that can result in product seizure, massive fines, and irreparable damage to brand trust.
Ensuring Adherence to Global Mandatory Standards
The inspector’s role is to act as the client's legal gatekeeper, verifying that products meet the specific safety directives of the intended markets.
-
Legal Enforcement and Market Recall. Inspections must confirm the presence and accuracy of all required safety certifications and markings (e.g., CE, UL, CCC, UKCA). On-site tests, which are often a preliminary check for formal lab results, must include:
-
Electrical and electronic products must be tested to ensure that they comply with a wide range of safety regulation such as local rules, CCC, CE, UL, REACH and more, to ensure the product in safe condition for an individual using and comply with legal, regional mandatory regulations.
The electrical safety tests carried out onsite during psi inspection are:
- Hi-pot check
- Earth continuity check
- Temperature measurement
- Stability check
- Internal check
-
Mechanical safety testing is required for many categories of products sold or imported into the European Union (EU), the US and other major markets.Mechanical failures can result in user injuries and even death, potentially exposing manufacturers, importers and retailers to costly legal action and the loss of brand reputation.
For example, verifying the absence of sharp points, hazardous edges, and pinch points, particularly crucial for toys and furniture, in accordance with standards like ASTM F963 or EN 71.
-
-
Beyond the immediate safety checks, the inspector verifies compliance with broader environmental and chemical regulations, such as REACH (Registration, Evaluation, Authorisation and Restriction of Chemicals) in the EU, by confirming correct documentation and material usage.
-
By meticulously documenting compliance during the PSI, the importer establishes a robust defense against potential product liability claims or regulatory investigations. This documentation provides objective evidence that all reasonable steps were taken to ensure the product was safe and legally compliant before it entered the distribution chain.
10. Packaging Check

The packaging is also checked to verify that the correct packing materials are being used to ensure safe transportation, and that correct packaging labels are applied. Inspectors verify the following five points.
The inspectors verify shipping mark, label, and barcode per item / PO against the spec and approval sample. The special requirement of clients such as the recycle symbol, warning statement, as well as the GW/NW of carton is always caught attention.
- Package / Packing method check against spec.
- Gift box, hangtag, label, IM verified against spec.
- Polybag check. Verify the width of polybag and punched hole, to see whether meet the requirement of the warning statement.
- Destination language, special requirement, claim match to the actual on the package check.
11. Close Meeting
After the on-site test, inspectors have a close meeting to get factory’s confirmation. It includes explanation to the suppliers and request for signature.
12. Inspection Report and Corrective Action Framework
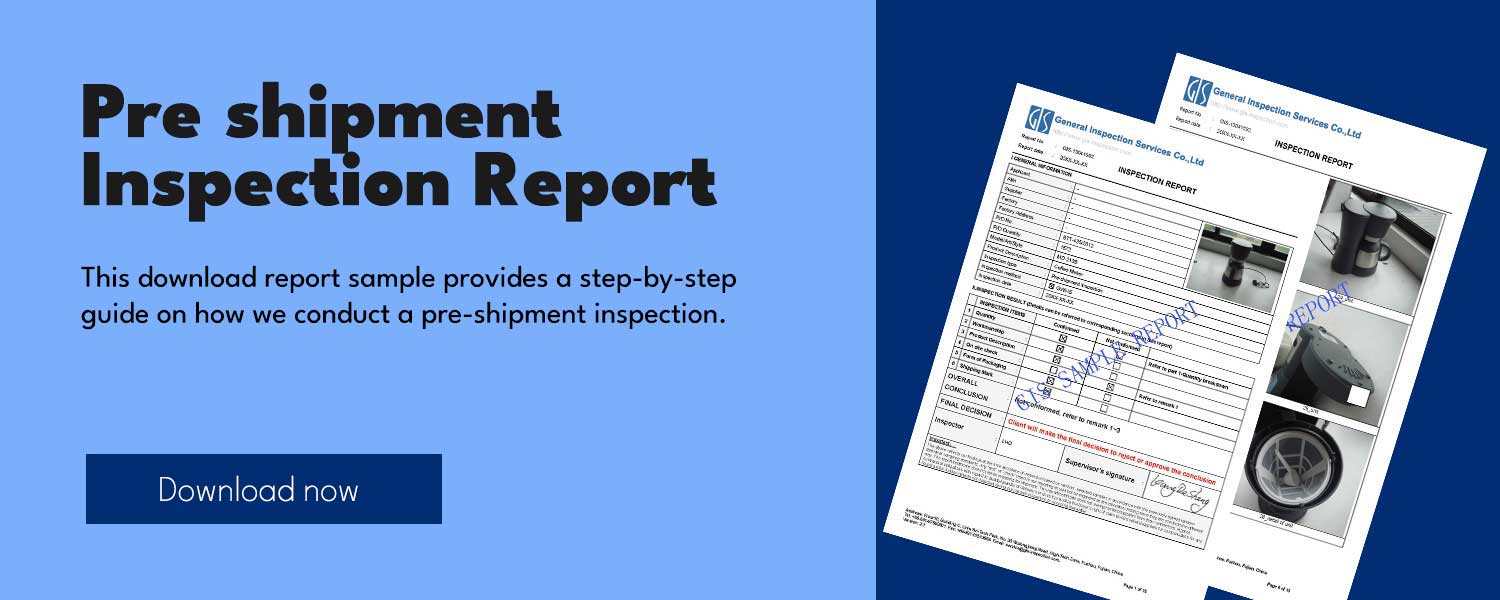
The final phase of the PSI process culminates in the generation of the Inspection Report, which must function as a comprehensive data-driven decision framework, not merely a record of findings. Its objective is to provide the importer with the objective evidence required to make an immediate, commercially sound decision regarding shipment disposition.
The Report as a Decision Support Tool
A professional inspection report must be unbiased, highly detailed, and traceable, enabling the importer to understand the full risk profile of the batch.
-
Depth Enhancement: The report structure must clearly segregate data:
-
Quantitative Results: The AQL pass/fail status, detailed counts of Minor, Major, and Critical defects, and verified quantity totals.
-
Qualitative Evidence: High-resolution, time-stamped photographic and video evidence of all discrepancies, accompanied by concise textual explanations, ensuring full traceability back to the specific sample carton and location.
-
-
Corroboration: Objective Verdict. The report must conclude with a clear, unambiguous recommendation: Pass (Release), Hold (Rework Required), or Reject. This objective verdict, based on the agreed-upon AQL and specifications, empowers the importer to act swiftly, thereby limiting financial liability and optimizing lead times.
Triggering Corrective and Preventive Actions (CAPA)
The inspection findings must serve as the catalyst for continuous improvement within the supplier relationship.
-
Expertise Focus: For any Hold or Reject decision, the report data should be used to initiate a formal Corrective and Preventive Action (CAPA) plan with the factory. This mandates the supplier to not only fix the current batch (Correction) but also to implement systemic changes (Prevention) to ensure the defect does not recur in future orders.
-
Corroboration: Supplier Development. By utilizing the report data to enforce the CAPA process, the importer leverages the PSI investment to actively drive supplier development and elevate long-term manufacturing quality, transforming the inspection from a reactive quality gate into a proactive quality partnership tool.
GIS pre shipment inspection services in China
A Pre-Shipment Inspection is a powerful tool that can help you ensure the shipment of high-quality goods that not only meet your requirements but the market standards as well. GIS Inspection provides independent psi inspections for a wide range of softlines, hardlines, electronics and food products.
If you would like more information about our Pre-Shipment Inspection services, please feel free to reach out us at service@gis-inspection.com.
Inspect by GIS Inspection
General Inspection Service-GIS is an international third-party quality control inspection company headquartered in China in 2005, which provides a professional range of product quality inspection and factory audit services to clients across multiple industries. We have set up an inspection network covering China, Vietnam, India and Malaysia. By employing only full-time inspectors, GIS is trusted by more than 12,000 brands globally.
